
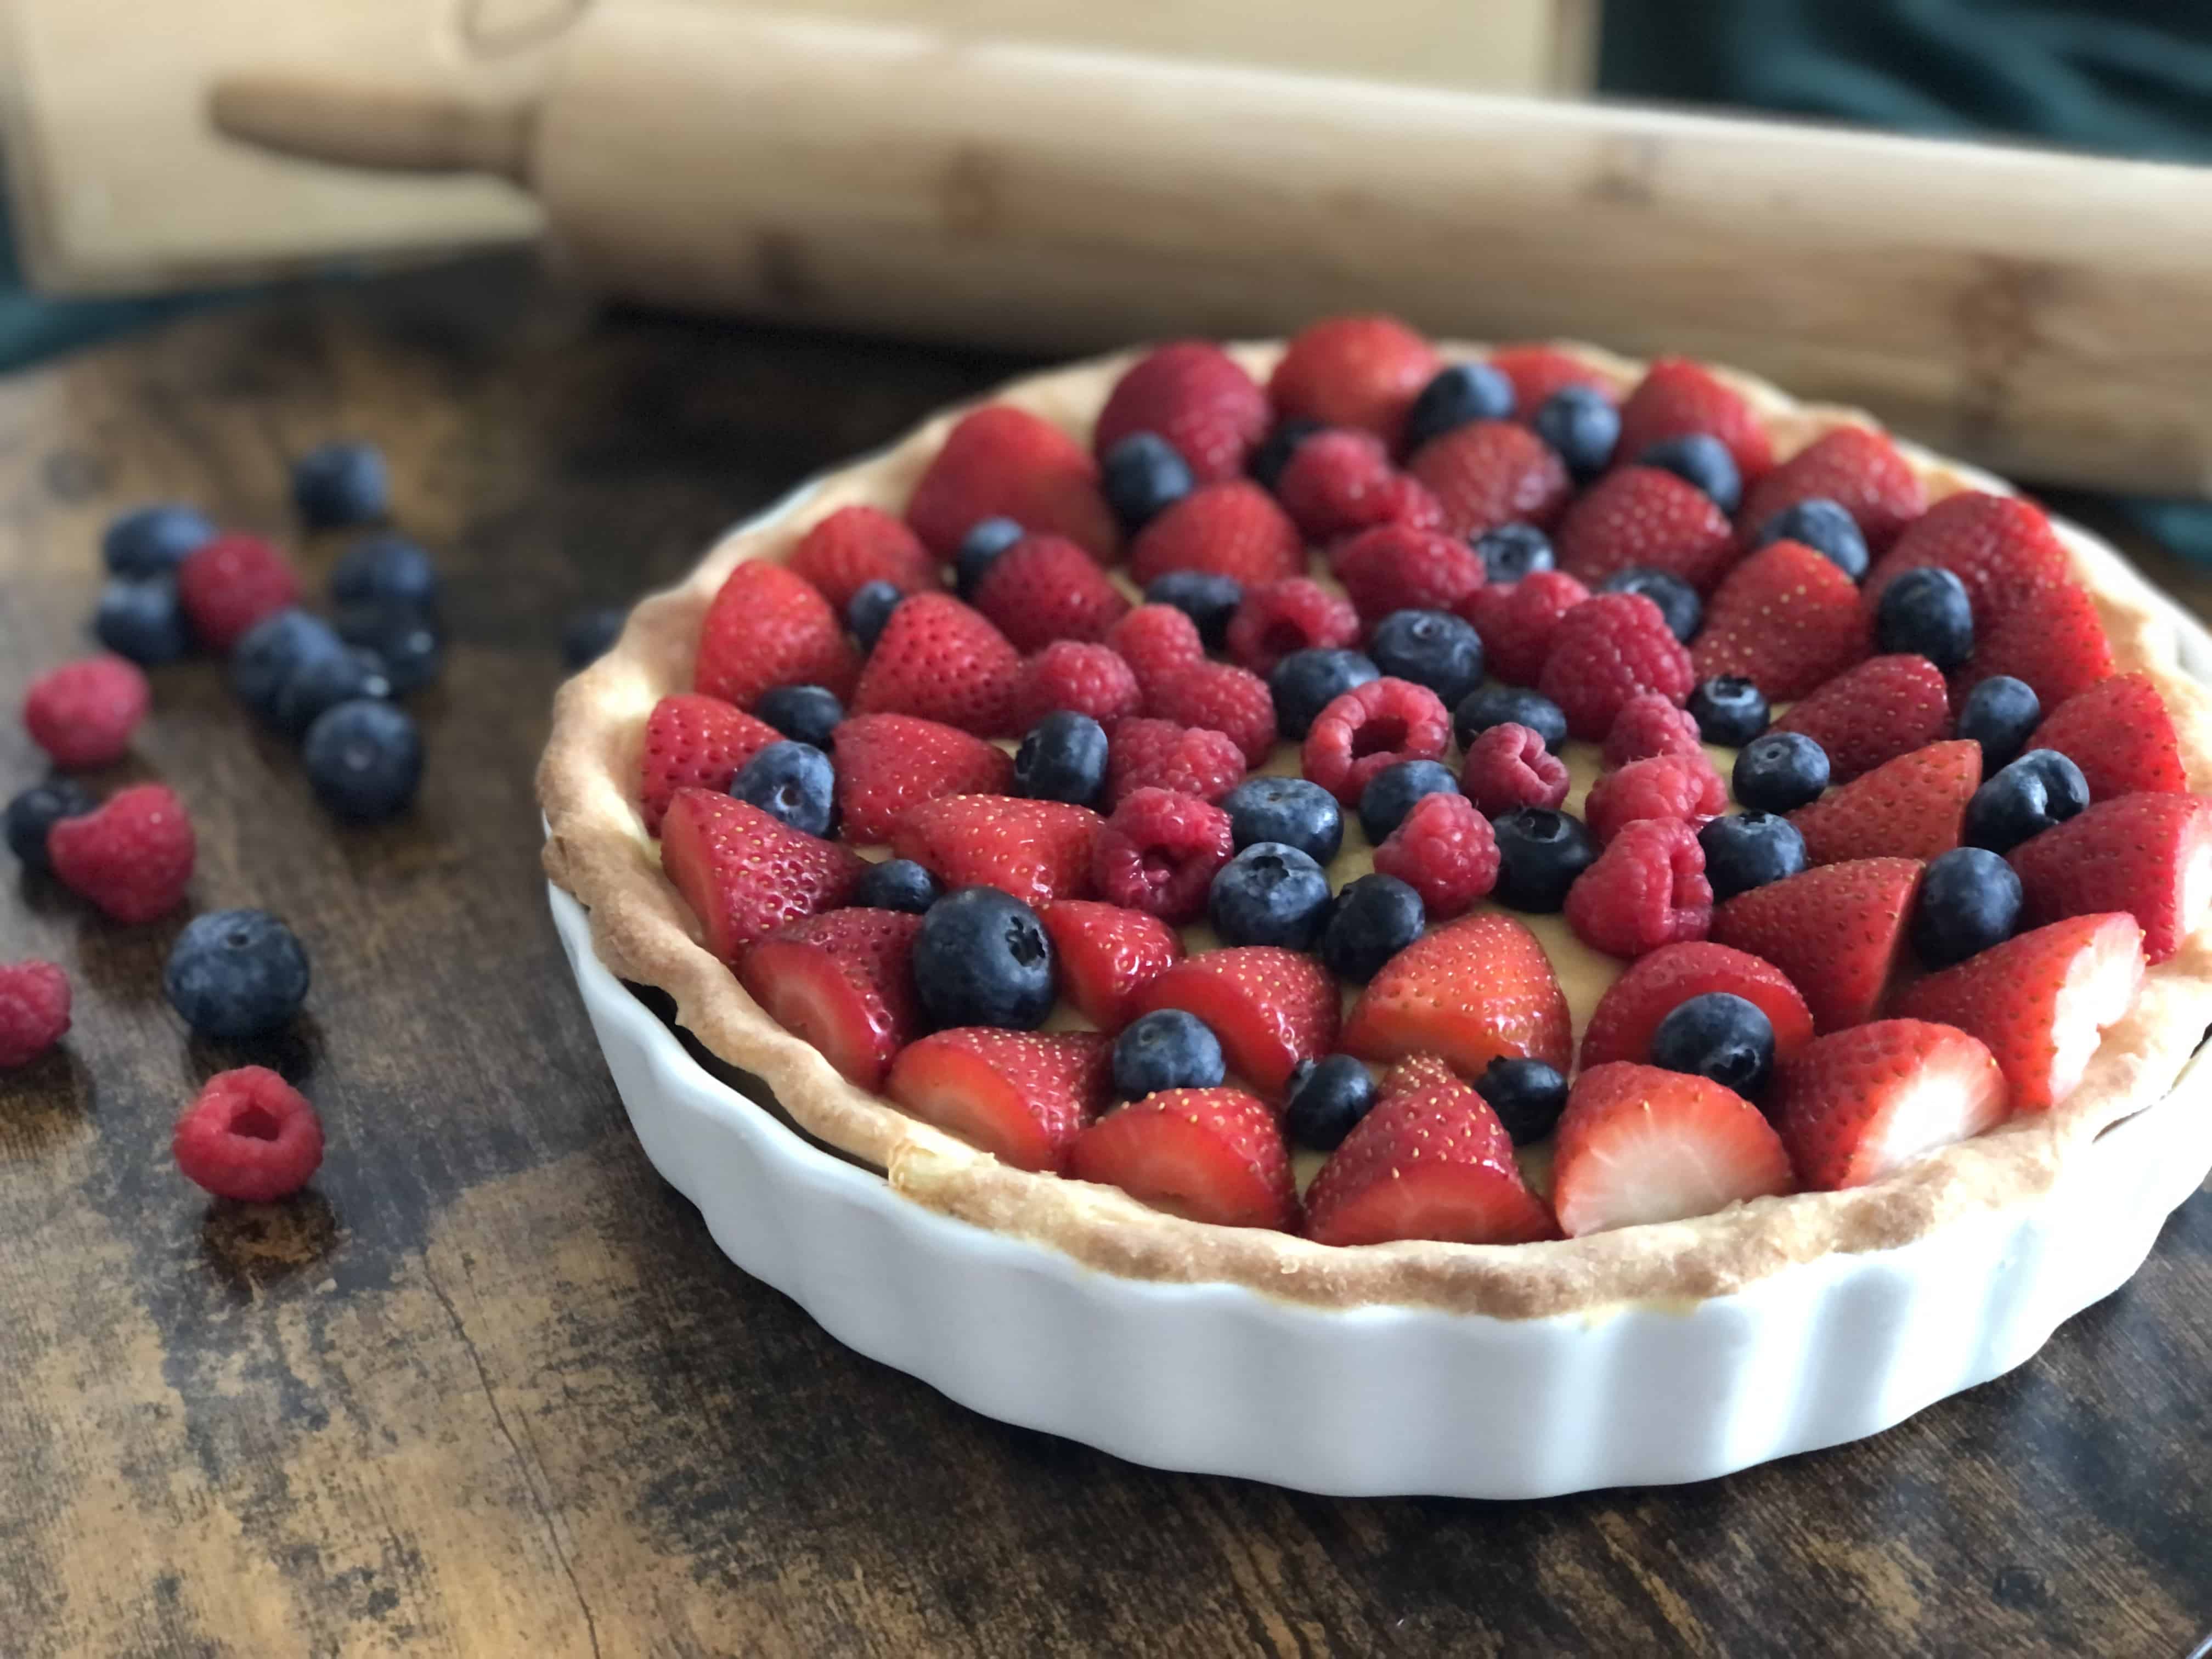
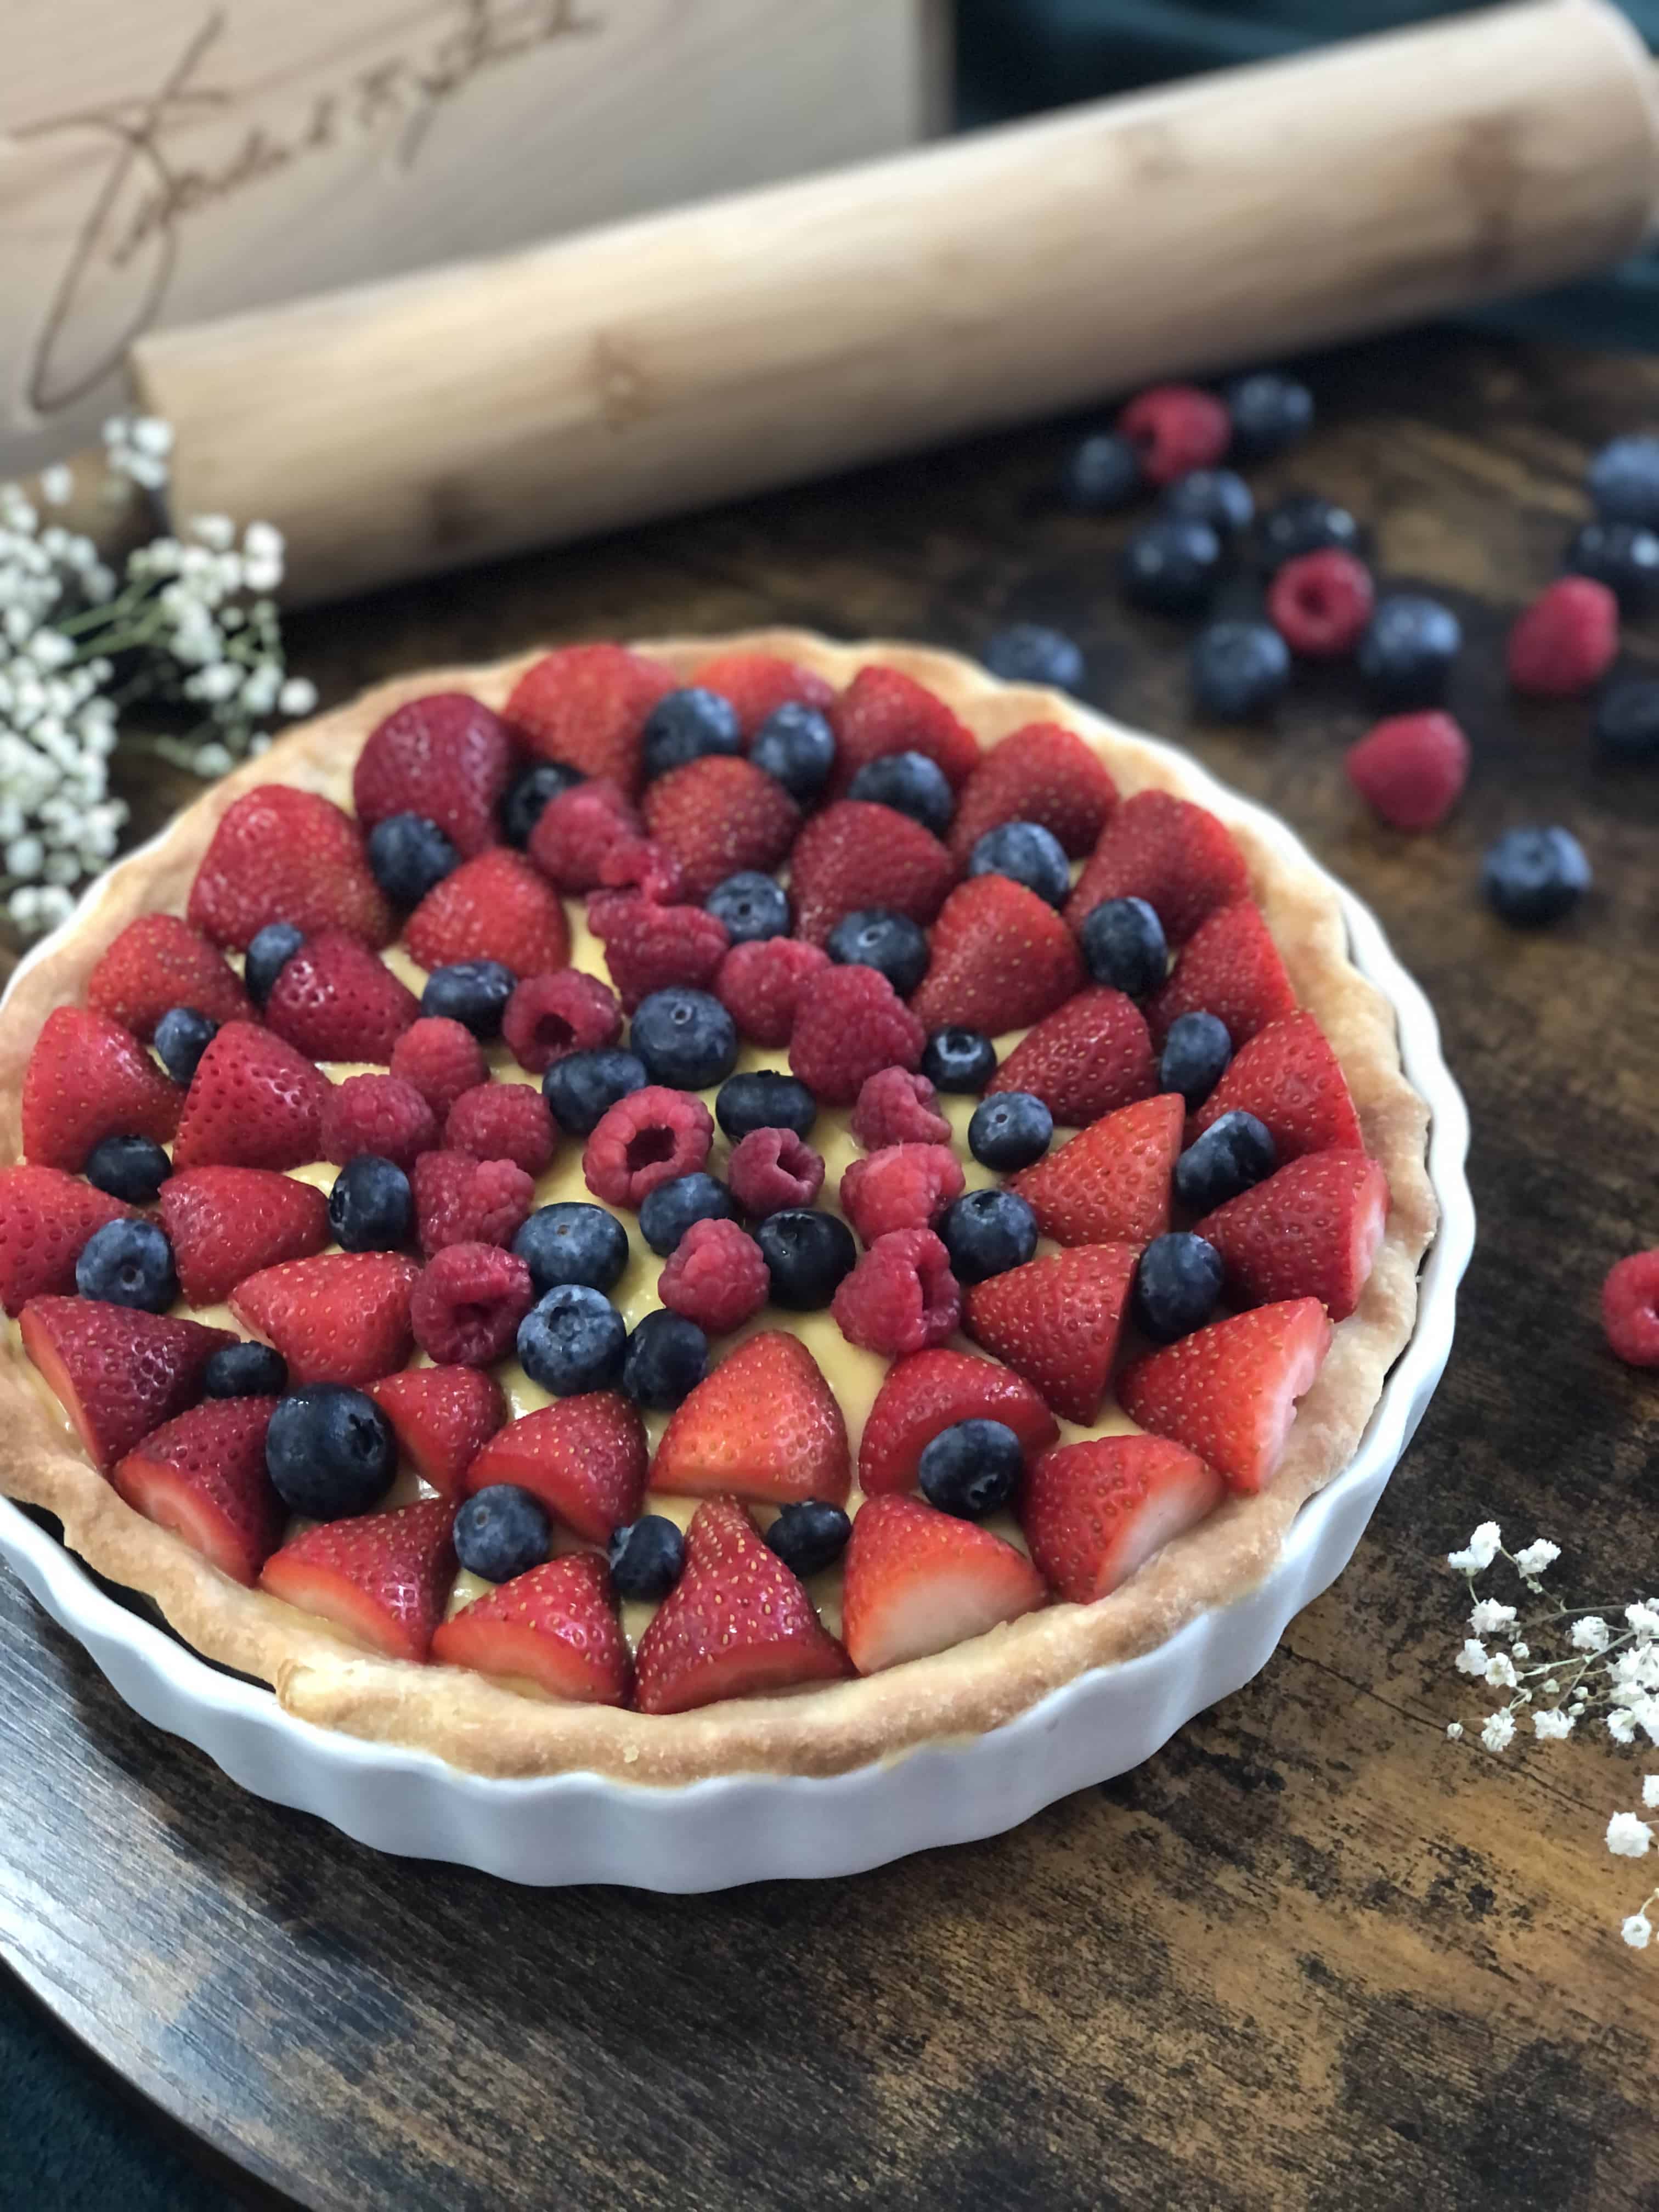
Mmm. Flakey and crumbly crust, smooth and creamy custard with sweet fresh berries on top created without any eggs or dairy!
The crust tastes and resembles the texture of a sugar cookie which balances well with the milky custard. This tart is great for any occasion as it’s light enough for spring and summertime events while also luscious enough for Thanksgiving and Christmas. You can choose any toppings you like, any fruit in season will do, or even a chocolate sauce. I love to add a dairy-free whipped cream on top as well!
I used Birds custard mix for my custard, but any custard mix should suffice. It took me a couple of tries to find the perfect ratio to make the custard hold form. Usually, any custard mix made to its instructions tends to be a little runnier.
Bird’s custard always makes me nostalgic as my Mom is from England, and I have many memories with my English family pouring hot custard over every dessert. The mix of warm apple cobbler, vanilla ice cream, and hot custard on top is literal heaven. If you haven’t tried it, this is your sign! Because of this, I wanted to try and create this custard tart with the Bird’s custard powder.
Traditionally, you would use milk for this recipe, but I’ve replaced the milk with creamy oat milk. You could also use coconut, soy, or almond milk, but oat milk is my personal favorite. Bird’s custard is also egg-free, whereas most other custard recipes call for eggs which makes this recipe perfect for anyone who is allergic or doesn’t consume animal products.
Luckily, Bird’s custard powder can be found easily. It’s in most grocery stores in their international section or the same aisle as other custard packages. You can easily order it online as well. I’ll link to it here.
I hope you love this recipe as much as I do. Who knows, maybe Bird’s custard will become a family favorite for you as well!
Instructions:
To Make the Crust!
Start by taking your flour, sugar, and salt and mixing them up in a mixing bowl. Then cut up your cold vegan butter into tiny cubes and add them into the mixing bowl along with your cold water. (It’s crucial that the butter and water are cold!
Next, you can either use your hands to mix everything up or use a food processor. I like using my hands to mix everything up, but a food processor might be quicker.
Mix up all the ingredients well until you start getting a dough. You’re going to want to make the dough into a nice, smooth ball. The dough should feel a little dry (That’s what will give your crust a flakey texture), but if it’s too dry to form a solid ball, you can keep adding very small amounts of cold water until everything starts sticking together better.
Once your dough ball is formed, wrap it in plastic wrap and stick it in the fridge for 10-15 minutes.
While you’re waiting for your dough, pre-heat your oven to 400 degrees.
Next, take out your tart baking dish, a rolling pin, and some extra flour.
Scatter some of the flour onto a flat surface to place your dough ball on. After your dough has been chilled, unwrap and place on the floured surface. Press down and start rolling the dough out, starting from the middle and evenly rolling out until it’s flat in a nice rounded shape. You can also use some cold water to patch up any areas that look dry or are cracking; make sure that your rolling pin has flour on it to prevent the dough from sticking. Your dough should be no more than a centimeter in thickness.
After you have your dough rolled out, place it gently and evenly over the tart dish. Start to knead the dough into place so that it fits the baking dish. Cut off any extra dough hanging off of the side. Keep about a centimeter of dough hanging over so you can create the wavy pattern. I like to use my thumb to press into the indents inside the dish and use my index finger on the outside divets to create that wavy tart crust. I follow the shape of the dish.
Once everything is in place, pierce the bottom of the dough with a fork to let air flow while it’s baking. (This will keep the crust flesh to the dish while in the oven)
Place foil over the whole dish and pop in the oven for 15 minutes.
After 15 minutes, remove the foil and brush vegan butter over the edges of the crust (this will give it gently browned edges when it’s done baking), then return the dish into the oven (without foil) and bake for another 15 minutes.
While the crust is baking, start on the custard filling.
To start, get a saucepan and mix the custard powder, sugar, and 2 tbsp of oat milk (take from the 2 1/3 cups) and mix until you get a paste.
After those are mixed up into a paste, add the rest of the oat milk. Turn on the stove to medium heat and heat.
While the custard is heating up, mix the corn starch with 1tbsp of cold water until it turns into a cloudy liquid/paste. Then add the cornstarch mix into the custard. (The cornstarch will help thicken the custard so that it has form in the tart) Keep stirring the custard mix until you can see it’s thickening and bubbling. You can take the custard off of the stove once you see it boiling with the bubbles. Remember to stir continuously, so you prevent a film from forming on the top of the custard.
Once your crust is all baked, you can place it in the fridge to cool down a bit, but it’s not necessary. I like to do this for about 5-10 minutes while stirring the custard off the stove to avoid forming a film. You want to keep it smooth before pouring.
Now add the custard filling into the crust. I like to use a spoon to make sure it’s nice and smooth, and evenly distributed. Make sure to bring the custard up around the edges of the crust, and it should settle nicely into the grooves.
Refrigerate the custard tart for about 3-4 hours, and this will make it set. The custard will have a creamy-jello-like texture and will take shape while cooling.
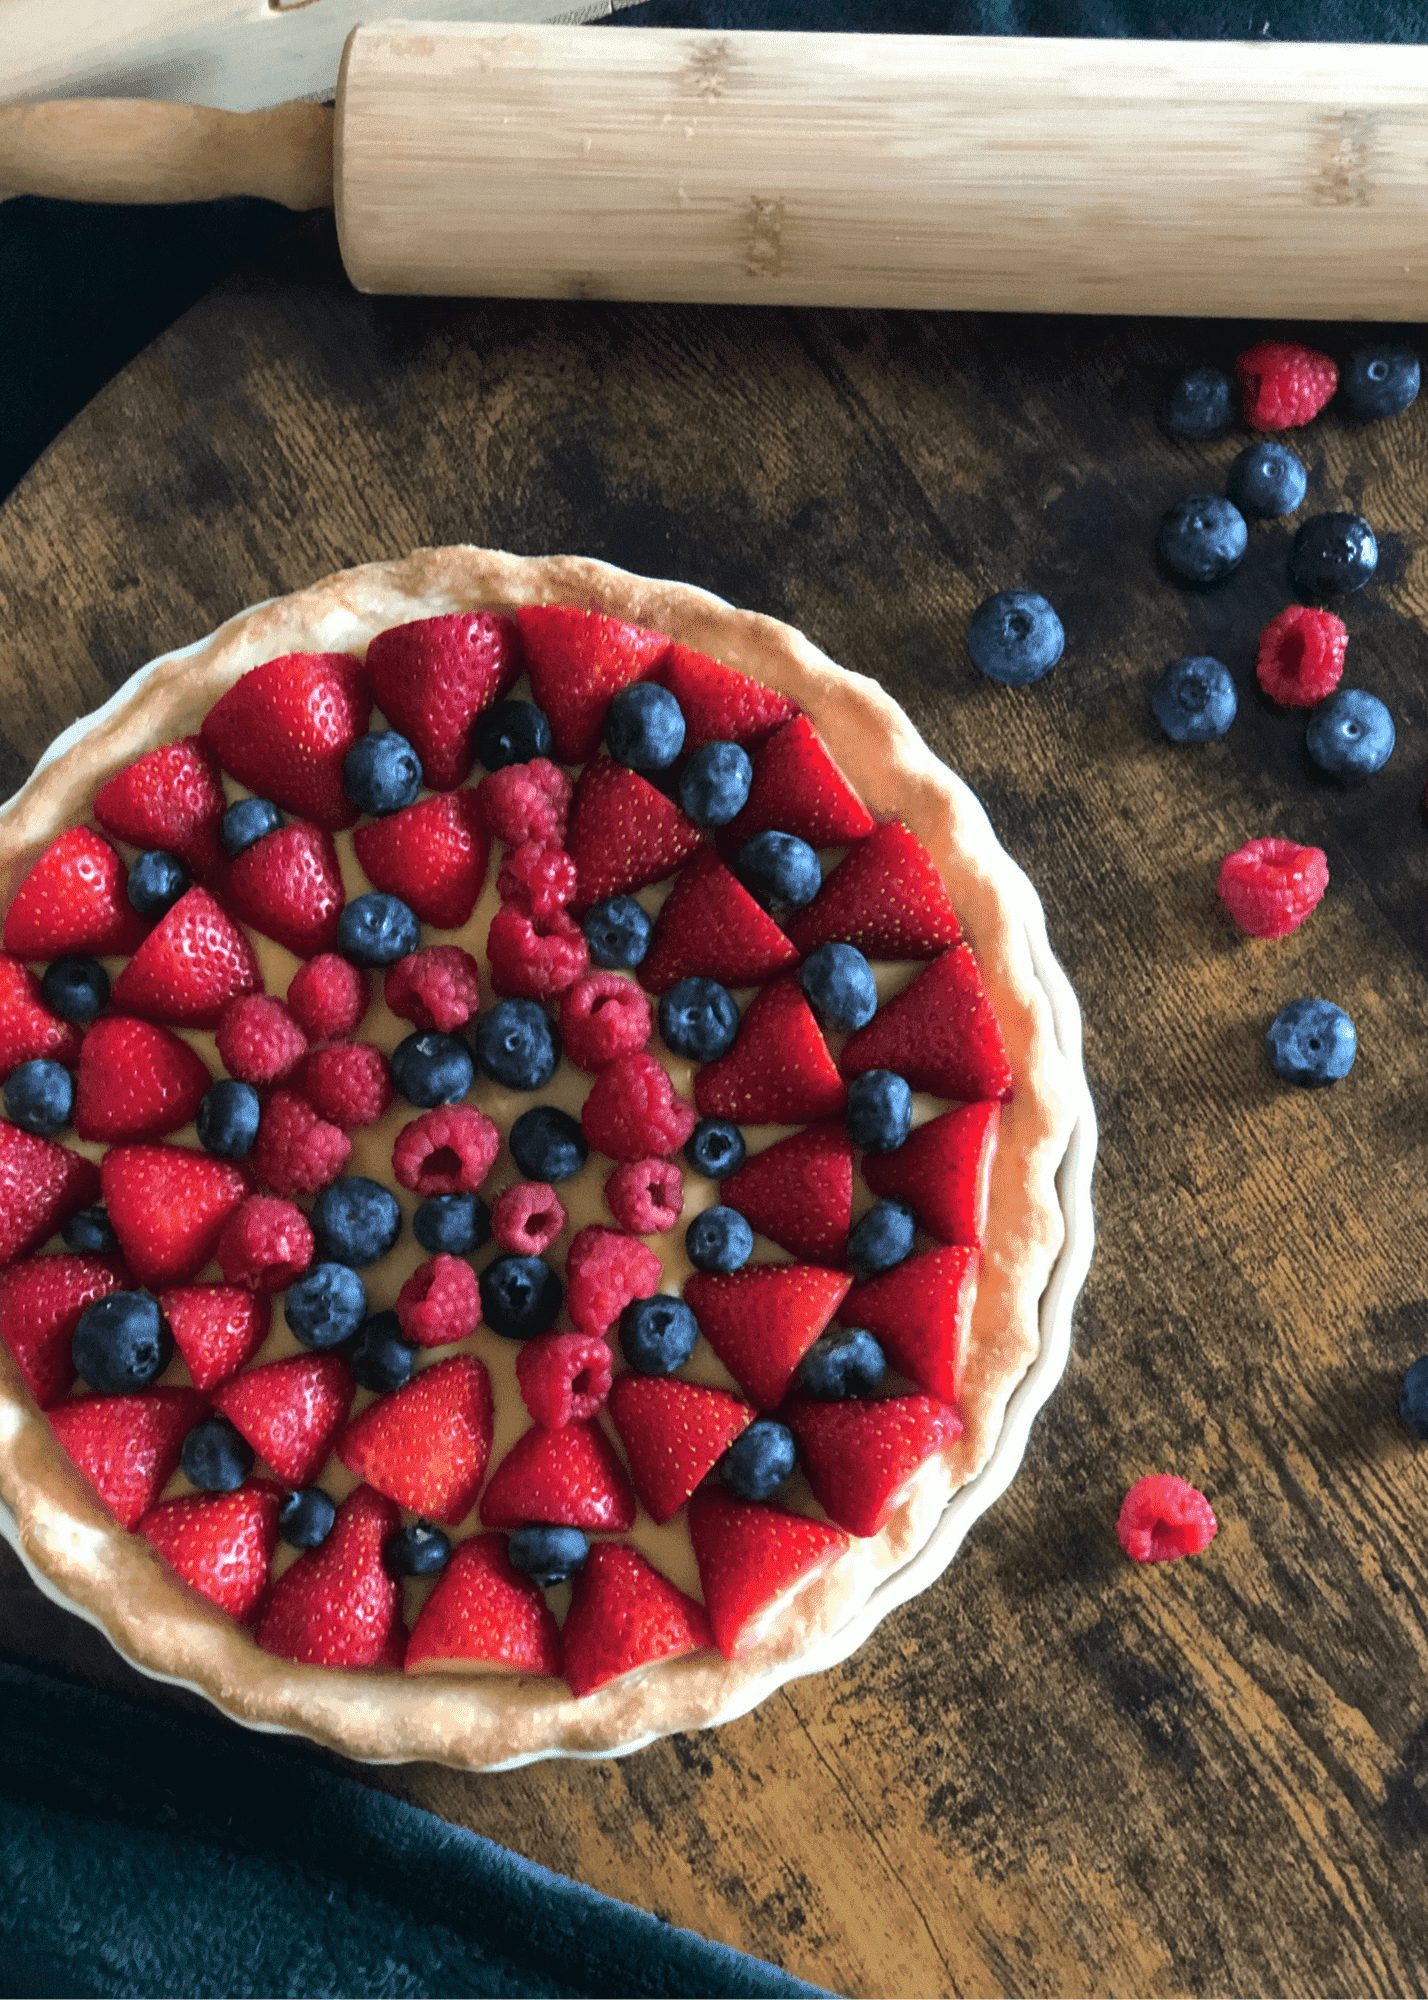
When it’s almost time for you to take the tart out of the fridge, start cleaning your berries, and chop your strawberries into your desired shape for the topping, you can get creative!
Once your topping is in place, you’re all set! Keep this refrigerated when not serving.
Last but not least, enjoy!
Fruit Custard Tart (Dairy and Egg Free)
- Total Time: 4 Hours
- Diet: Vegan
Description
Flakey, creamy, and sweet Fruit Custard Tart. Perfect for any occasion!
Ingredients
For the Crust:
- 2 Cups of All Purpose Flour
- 1/4 Cup Plus 1Tbsp. White Sugar
- 1/2 Tsp. Salt
- 8–9 Tbsp. Cold Vegan Butter
- 5–6 Tbsp. Cold Water
For the Custard:
- 2 1/3 Cups of Oat Milk
- 4 Tbsp. Sugar
- 4 Tbsp. Bird’s Original Custard Powder (Not the instant Bird’s Custard mix, it contains whey)
- 1 Tbsp. Plus 1 Tsp. of Corn Starch
- 1 Tbsp. Cold Water (To mix with corn starch before adding)
For the Toppings:
- Whole Strawberries
- Blueberries
- Raspberries
Instructions
To Make the Crust!
Start by taking your flour, sugar, and salt and mixing them up in a mixing bowl. Then cut up your cold vegan butter into tiny cubes and add them into the mixing bowl along with your cold water. (It’s crucial that the butter and water are cold!
Next, you can either use your hands to mix everything up or use a food processor. I like using my hands to mix everything up, but a food processor might be quicker.
Mix up all the ingredients well until you start getting a dough. You’re going to want to make the dough into a nice, smooth ball. The dough should feel a little dry (That’s what will give your crust a flakey texture), but if it’s too dry to form a solid ball, you can keep adding very small amounts of cold water until everything starts sticking together better.
Once your dough ball is formed, wrap it in plastic wrap and stick it in the fridge for 10-15 minutes.
While you’re waiting for your dough, pre-heat your oven to 400 degrees.
Next, take out your tart baking dish, a rolling pin, and some extra flour.
Scatter some of the flour onto a flat surface to place your dough ball on. After your dough has been chilled, unwrap and place on the floured surface.
Press down and start rolling the dough out, starting from the middle and evenly rolling out until it’s flat in a nice rounded shape. You can also use some cold water to patch up any areas that look dry or are cracking; make sure that your rolling pin has flour on it to prevent the dough from sticking. Your dough should be no more than a centimeter in thickness.
After you have your dough rolled out, place it gently and evenly over the tart dish. Start to knead the dough into place so that it fits the baking dish. Cut off any extra dough hanging off of the side. Keep about a centimeter of dough hanging over so you can create the wavy pattern. I like to use my thumb to press into the indents inside the dish and use my index finger on the outside divets to create that wavy tart crust. I follow the shape of the dish.
Once everything is in place, pierce the bottom of the dough with a fork to let air flow while it’s baking. (This will keep the crust flesh to the dish while in the oven)
Place foil over the whole dish and pop in the oven for 15 minutes.
After 15 minutes, remove the foil and brush vegan butter over the edges of the crust (this will give it gently browned edges when it’s done baking), then return the dish into the oven (without foil) and bake for another 15 minutes.
While the crust is baking, start on the custard filling.
To start, get a saucepan and mix the custard powder, sugar, and 2 tbsp of oat milk (take from the 2 1/3 cups) and mix until you get a paste.
After those are mixed up into a paste, add the rest of the oat milk. Turn on the stove to medium heat and heat.
While the custard is heating up, mix the corn starch with 1tbsp of cold water until it turns into a cloudy liquid/paste. Then add the cornstarch mix into the custard. (The cornstarch will help thicken the custard so that it has form in the tart) Keep stirring the custard mix until you can see it’s thickening and bubbling. You can take the custard off of the stove once you see it boiling with the bubbles. Remember to stir continuously, so you prevent a film from forming on the top of the custard.
Once your crust is all baked, you can place it in the fridge to cool down a bit, but it’s not necessary. I like to do this for about 5-10 minutes while stirring the custard off the stove to avoid forming a film. You want to keep it smooth before pouring.
Now add the custard filling into the crust. I like to use a spoon to make sure it’s nice and smooth, and evenly distributed. Make sure to bring the custard up around the edges of the crust, and it should settle nicely into the grooves.
Refrigerate the custard tart for about 3-4 hours, and this will make it set. The custard will have a creamy-jello-like texture and will take shape while cooling.
When it’s almost time for you to take the tart out of the fridge, start cleaning your berries, and chop your strawberries into your desired shape for the topping, you can get creative!
Once your topping is in place, you’re all set! Keep this refrigerated when not serving.
Last but not least, enjoy!


- Prep Time: 25 minutes
- Cool Time: 3 Hours
- Cook Time: 35 Minutes
- Category: Dessert
- Method: Baking
Keywords: custard tart, bird’s custard, fruit tart, dessert
Just a quick note- Bird’s custard powder isn’t dairy free- it has whey powder and milk proteins in it. A warning to my fellow lactose intolerant bakers!
Bird’s original custard mix is dairy-free. Bird’s instant custard mix has the whey!